Get a Jump on Your Okra Crop by a Month or More

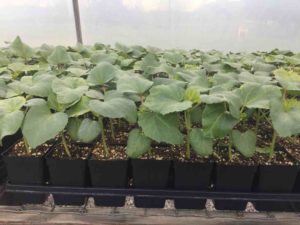
If you love okra as we do, you want it in the garden as soon as possible. That is why we start our okra in the greenhouse and set the plants out when most folks are sowing the seeds. This gives us more than a month’s jump on the season. We always start more than we need for our garden and make the extras available to you. This is the best crop of okra we have had in years. Come by and get yours today.

Of course tomato, pepper, and eggplant plants are ready too. If your fancy turns to herbs we have chives, parsley, basil, and cilantro. Looking down the weather forecast as far as we can, it appears that it is safe to set all of your starts out. We also have Wave Petunias in purple, red, and pink. We also have red periwinkles, and a small assortment of perennial (first-year) flowers: foxglove, purple coneflower, and columbine.

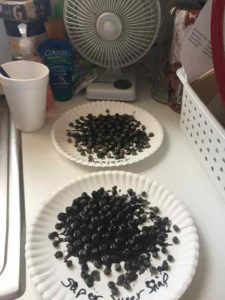
Now if you still like to sow your okra directly in the garden like your grandparents did, we save seed from the best of our Clemson Spineless crop each year and we have okra seed for everyone who asks, FOR FREE (while supplies last). Just ask.

Here are some tips for you okra seed sowers out there:

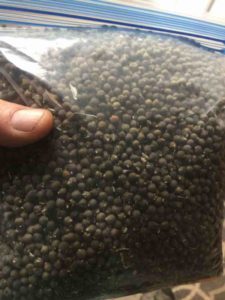
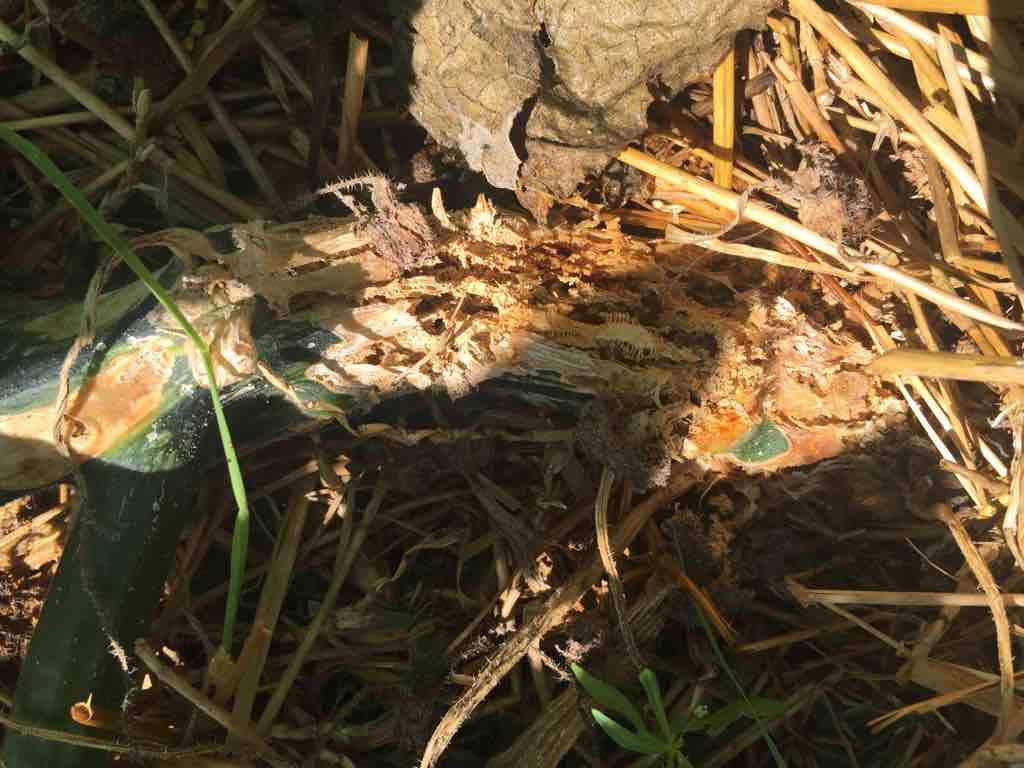
  1. Soak the seed in a glass of water for a day before sowing. We pump air into the water using an aquarium pump to keep the seeds moving which keeps the seed roots straight.
  2. Don’t let the roots get too long before sowing the seeds, and don’t let the seeds dry out before sowing.
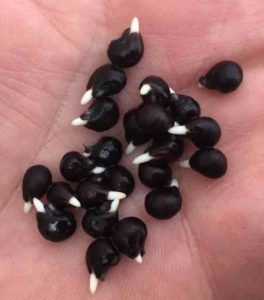
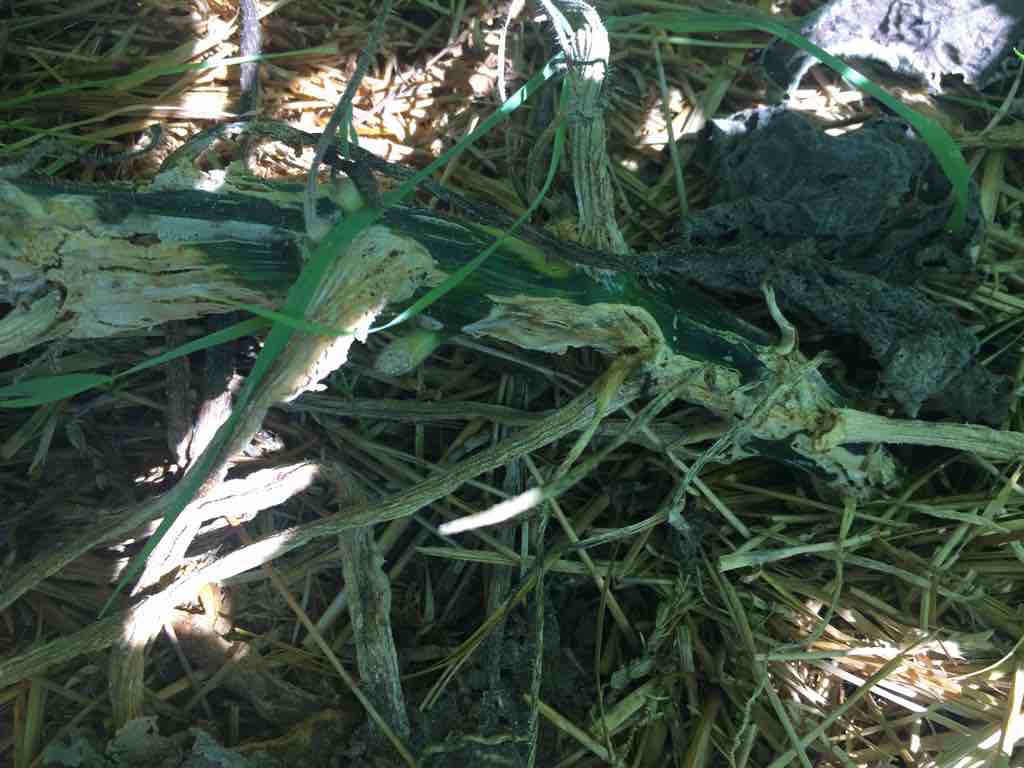
  3. Sow only the seeds that show a root emerging (see the last photo).
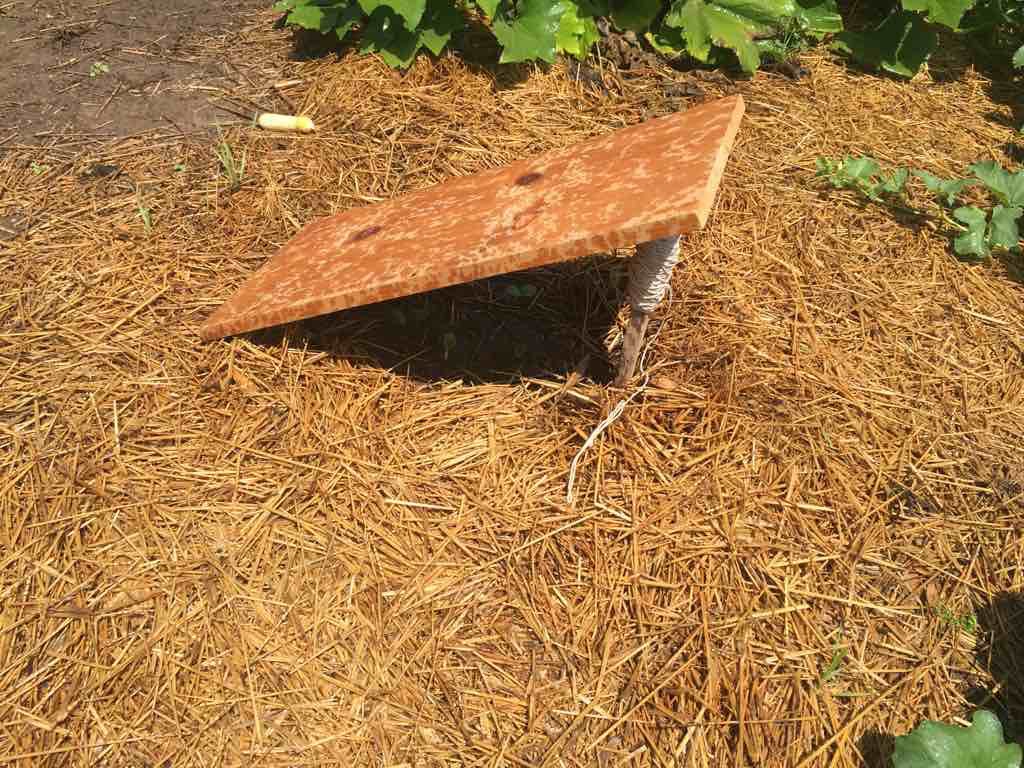
  4. Sow the seed no more than a half inch deep.
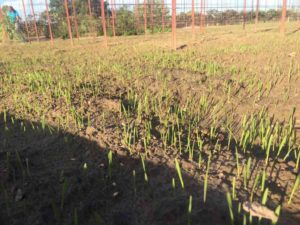
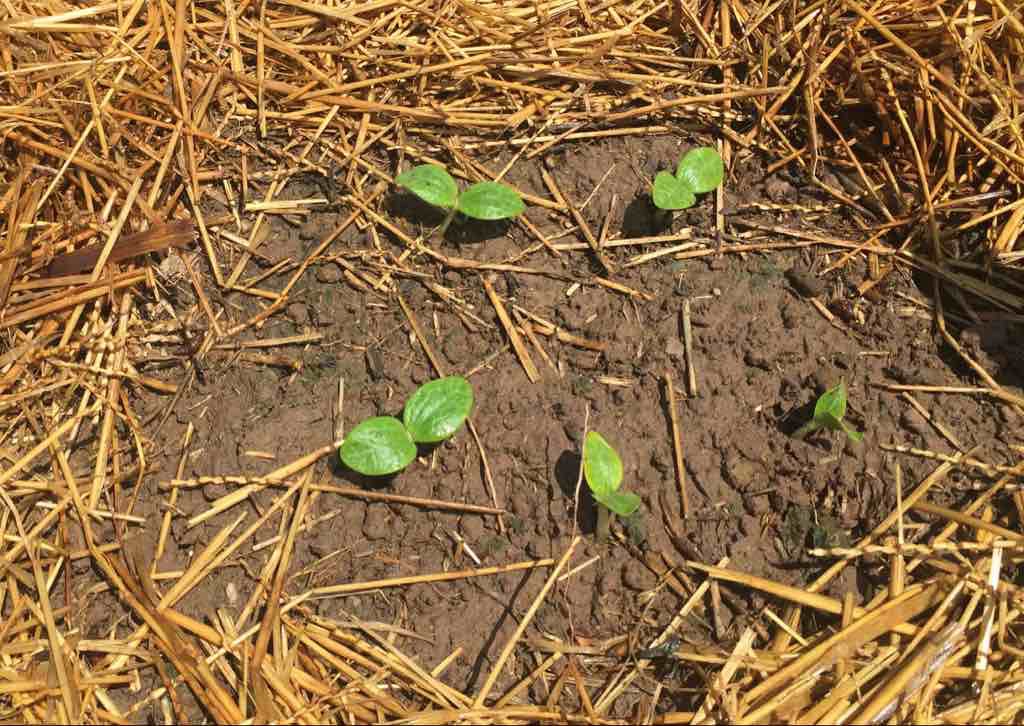
  5. Sow okra thickly. Okra has notoriously bad germination.
  6. Water your okra rows as soon as they have been sown.

Pruning Grapes

Before Pruning
Before Pruning

We finished pruning our grapes this week. Every spring it is a dramatic affair because of how much plant material we remove. Next year’s production comes from this year’s growth. Way more material is produced in one year than the grape-vine is able to handle. If left unpruned, a typical grape-vine will produce small grapes, and be highly susceptible to disease and insects. Not only will multiple vines arise all along the main trunk, but new growth will originate at the terminus of last year’s production laterals. Left unpruned several years these laterals will travel down the trellis fifty feet or more. The vines pictured here are three-year-old plants, and are a Concord-type variety called Fredonia. It makes wonderful juice for cider or jelly.

Pruning grape-vines is kind of like working a jig saw puzzle, or filling out a Sudoku puzzle. You want to pick the four best lateral arms to tie along the trellis, but all of the lateral are far longer than necessary, so long that they extend over into the spaces of the neighboring plants. You have to carefully determine which laterals are connected to the particular vine you are currently working on and which are connected to the adjacent (or beyond) plant. Careful multiple cuts are necessary to insure the best four “arms” are selected for each vine.

After Pruning
After Pruning

Okay, here is what the finished product looks like. You would be surprised, but by the end of the season you are back where you started with a tangled mess. We even prune multiple times throughout the summer to promote adequate air flow around and through the vines.

We usually wait to prune until leaf buds begin to emerge, so gently untangling the intertwining laterals is a must. Another issue is having to sometimes make a lateral branch snaking off to the right (or left) and force it to the left (or right) because no logical option exists. When it comes to pruning grapes, slow and steady wins the race.


How We Set Out Our Tomato and Pepper Plants

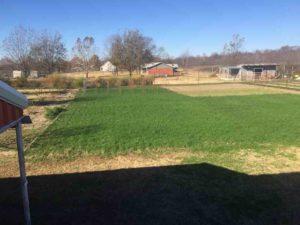
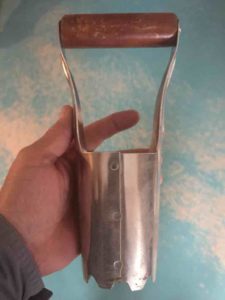
Over the years we have found that a standard bulb planter is the best tool for setting out our tomato and pepper starts in the spring. It works well for broccoli and cabbage plants too; in fact, everything we grow in our standard 2½” deep pots are set out with a common bulb planter. Our gardening methods involves not tilling the ground in the spring. In the fall, winter wheat is sown in the garden as a cover crop. The “cover” keeps winter weeds from getting a foothold and pumps organic matter into the soil, among other things. Dead wheat stubble is all that litters the ground in the spring at planting time.

With a push and a twist a perfect hole is made for the tomato or pepper plant. We drop the start undisturbed into the hole and press a little of the soil from the hole back around it to fill in the cracks, and water the new plant well to further settle it into its new home.

We hope this helps you in your garden this spring. If you don’t already have a bulb planter, below is a link on Amazon to a very affordable one. Clicking through from this site helps pay the bills for our website. Thanks in advance.

[amazon_link asins=’B000BWY4FO’ template=’ProductAd’ store=’us-1′ marketplace=’US’ link_id=’14b9be00-4599-11e8-9355-cd821d8d5275′]

Water Your Landscape in the Winter

Yesterday we got out and hand watered the orchard. We added six young trees this fall; four apples and two pears, so they especially got a thorough watering. Just because your trees and shrubs aren’t green and growing during the winter doesn’t mean that they do not need regular moisture. In many ways they need it just a much now as in the heat of summer. Especially this year, supplemental winter watering is a must. Here are some reasons why:

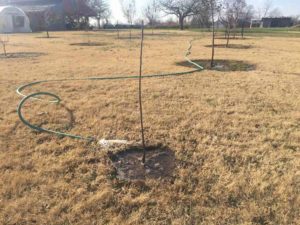
  1. Newly fall-planted trees and shrubs are still establishing their root systems. Fall is the optimum time of year to plant, especially fruit trees.
  2. Winter is often windy, which can draw moisture from bark and stems of your plants.
  3. In the fall of the year moles are quite active and work the soil up, especially around newly disturbed ground where new plants are set. Watering regularly helps pack this soil back down and eliminate excess air pockets.
  4. During the winter months in this part of the country it rains far less than at other times of the year. In many ways it is just like the heat of summer: harsh.
  5. Especially this year we have had no measurable rainfall in the last month. It is helpful to keep track by posting moisture events on a calendar app just so you don’t forget about your valuable investments in your landscape. In past years we have learned this lesson the hard way. Don’t think your special tree is too big to worry about.

Let us take this opportunity to wish all of you a very Merry Christmas. May His blessings be upon you this coming Holiday season and in the growing season of 2018. We look forward to seeing you in the spring.

Sweet Wheat: Winter Cover Crop, 2017

Wheat just coming up after about 10 days.

Every fall we sow hard red winter wheat in our garden. We call it “putting the garden to bed.” Most just call it planting a winter cover crop.

We usually begin sowing in late September. It can be done as late as late November. Here is how it is done :

  1. First, after gleaning every last tomato and pepper, we clear away all that remains in the garden. Much of the plant material at the end of the season harbors disease and/or insects so we like to remove as much as possible to another location and burn it. That way next season will start out clean and fresh. Another practice that promotes healthy gardens is to rotate crop families every year in the garden, but that is another topic for another post.
  2. Next, we lay down a complete fertilizer such as 10-20-10 over the entire garden with a broadcast spreader. We run the spreader north/south with half of the load and then spread the other half going east/west. This gives a more uniform cover of fertilizer.
  3. Lightly till the garden, going over it in one direction, and then again at 90Âş to that. Till only deep enough to incorporate the mulch into the soil.
  4. Using the broadcast spreader we then scatter our wheat seed over the garden, again splitting the amount in half and making two passes over the entire garden, one at 90Âş to the other. This detail evens out the spread of the seed, giving a uniform cover of wheat.
  5. Go over the plot one more time very lightly with the tiller. We don’t want to work the seed too deeply into the soil or it will not come up. The optimum seed depth is one inch, but the seeds will come up if just barely covered or if no more than two inches cover them.
  6. If rain is not in the forecast, set up sprinklers. If there is just a little moisture in the soil and it doesn’t rain within a week, the wheat could emerge and then die.
Here’s what it looks like now, two months after being sown.

So what are the benefits of a winter cover crop in your garden, you might ask.

  1. Planting a cover crop helps suppress unwanted weeds over winter.
  2. A cover crop helps hold the soil in place, inhibiting erosion due to wind and rain.
  3. It also helps build organic matter into the soil which in turn helps the soil retain moisture and nutrients better.
  4. When mowed throughout the winter and eventually tilled back into the soil in the spring, the wheat provides a natural slow-release fertilizer.
  5. As you can see, a garden plot sown with wheat in the fall provide a pleasant island of green in a winter-long ocean of browns and grays. I gives you something enjoyable to look at while waiting for winter to pass.

Succession Planting

We have had a terrible time this year with Squash Vine Borers. It seems to be the worst we have ever experienced here at High-Fence Farm. With seven yellow squash hills and three zucchini hills we have had plenty of squash for home use as well as sales—until recently. One by one the vines have succumbed to the borers, till we are down to about half the original hills and maybe only a quarter of the original production of squash. Those plants/hills that remain aren't long for this world.

The solution for us is to pull up the dead vines and replant. Squash plants begin to bear fruit from seed very quickly so we will be back up and harvesting plenty of both Zucchini and Yellow Squash in no time. During the heat of summer there are a few tricks to successful garden seed germination. Hand watering the newly seeded hill is a must since rain showers are few and far between after the end of June. Watering alone usually will not do the trick unless you just happen onto a stretch of cooler-than-normal or cloudy days. What we usually do is provide just a bit of shade for the seed bed until the seedlings are up. You must monitor the bed daily so you can remove the shade as soon as the seeds break the ground. This will keep them from stretching to find the sun.

We hope you are having a good gardening season this year. We sure have. Until lately the weather has been perfect. The last few weeks have been dry, but that is what soaker hoses and sprinklers are for. Happy gardening.

Sowing Peas in the Spring Garden

Pea Seeds

Home-grown English peas, fresh from the back-yard garden, has always been a real treat for us. When our children were growing up we rarely saw any peas actually make it into the kitchen; our children would graze up and down the pea rows, picking the green pods and eating the little green jewels like candy. Admittedly, the two adults in this family often would resort to this same practice, if the younger members should happen to forget they were there on occasion.

Growing peas in the home garden is really simple. Just a few tips are necessary to get the most out of your spring planting of peas:

  1. Start Early: OSU’s Oklahoma Garden Planting Guide, gives Feb. 15 to March 10 as the sowing window for spring-planted English, Snap, or Snow peas. Don’t worry that Oklahoma’s last spring frost occurs around the 10th of April. Peas are quite hardy and really need all of the cool of spring they can get. Plant as early as possible. If you are past March 10, plant them anyway, so long as it isn’t mid June. In that case wait till you plant your Fall Garden.
  2. Inoculant Grow an upright/climbing variety. They are easier to pick, get the crop off the ground, and provide a much larger/longer harvest. We like Maxigolt for an English/shelling-type pea, and Super Sugar Snap for a snap pea. Each variety grows to around 48″, so you will need to provide some kind of fence for them upon which to grow.
  3. Inoculate your seed. You don’t know what the heck that means? Well, look for an explanation here. This is really quite easy, but here is a method to get the most out of your inoculant: Use fresh inoculant (notice the expiration date on the bag.). Put seed to be planted in a small paper cup. We usually use 100 seed to plant a 30 foot row. Add a teaspoon of sugar and a teaspoon of inoculant plus just enough water to make it all wet. Stir the mix thoroughly and pour the contents onto a paper plate and leave to dry under a small fan.
  4. Inoculated Peas Drying
    Inoculated Peas Drying

    While your seed mix dries, go out and set up your fence and hoe a row in the garden about two inches deep.

  5. Plant your seed about four inches apart and two inches deep. Cover the row up and water if rain is not expected soon.
  6. If you haven’t already planted potatoes, find a neighbor who has and work out a deal to share some of your peas in exchange for some of his new potatoes. Nothing tastes better together.
  7. Happy gardening.